Since 2011, all computers with an Intel processor has a hidden little operating system inside. It is called Intel Management Engine, an OS based on Minix. It can access the network adapters, full access of RAM, and is even on when the computer is completly off. There is no doubt it is very handy for enterprise useage, but it worries many that it is still there for consumer processors and there is absolutely no way to turn it off. That is, until me_cleaner project comes to rescue.
This project allows the users to disable most of the functionalities of ME and shrink down the size of ME (from 5MB to ~86KB). Because ME (after around 2011) manages the hardware initialization, it is not possible to eliminate ME totally now. But we can still strip it to a status that it can only initialize the hardware and not much else.
When used with coreboot, an almost completly open source firmware can be built.
Some explanations
- coreboot
- Formally LinuxBoot, it is a project aimed to provide a lightweight and open source replacement of the BIOS/UEFI in most computers.
- me_cleaner
- A Python script to eliminate or remove most functionalities of Intel Management Engine
ThinkPad X220 is a good choice for this combination. It is one of the few hardware supported by coreboot, and it is relatively cheap to grab. Also, there is plenty of documentation about how to do it.
It is not trival to go through the whole process. You need at least some knowledge about Linux and command line. Flashing the chip may potentially fry your chip, and if you do it wrong, you may lose the content of the original BIOS and make the motherboard useless. If you want to do it, proceed with caution.
Preparations
You need:
- ThinkPad X220
- SOP-8 Clip (To connect to ROM chip)
- Raspberry Pi (For its spi capability)
- Another computer (Or monitors and keyboard for rPi, I recommand another computer because the compiling on rPi is really slow)
And your patience!
Prepare the rPi
I use Raspbian on my Raspberry Pi. Do the usual stuff to initialize your rPi.
Then, use sudo raspi-config to enable SPI. Enter Interfacing Options and choose SPI.
Dump the original firmware
Before you do anything, REMOVE THE BATTERY and DISCONNECT THE POWER SOURCE!
Now, disassemble the laptop. Make sure you check the X220 Hardware Maintenance Manual.
Remove screws that has marks of palmrest and keyboard around. Then, push the keyboard forward and lift it. Remove the ribbon cable for the keyboard and a little ribbon for the touchpad and fingerprint sensor. Now you should be able to lift the palmrest up.
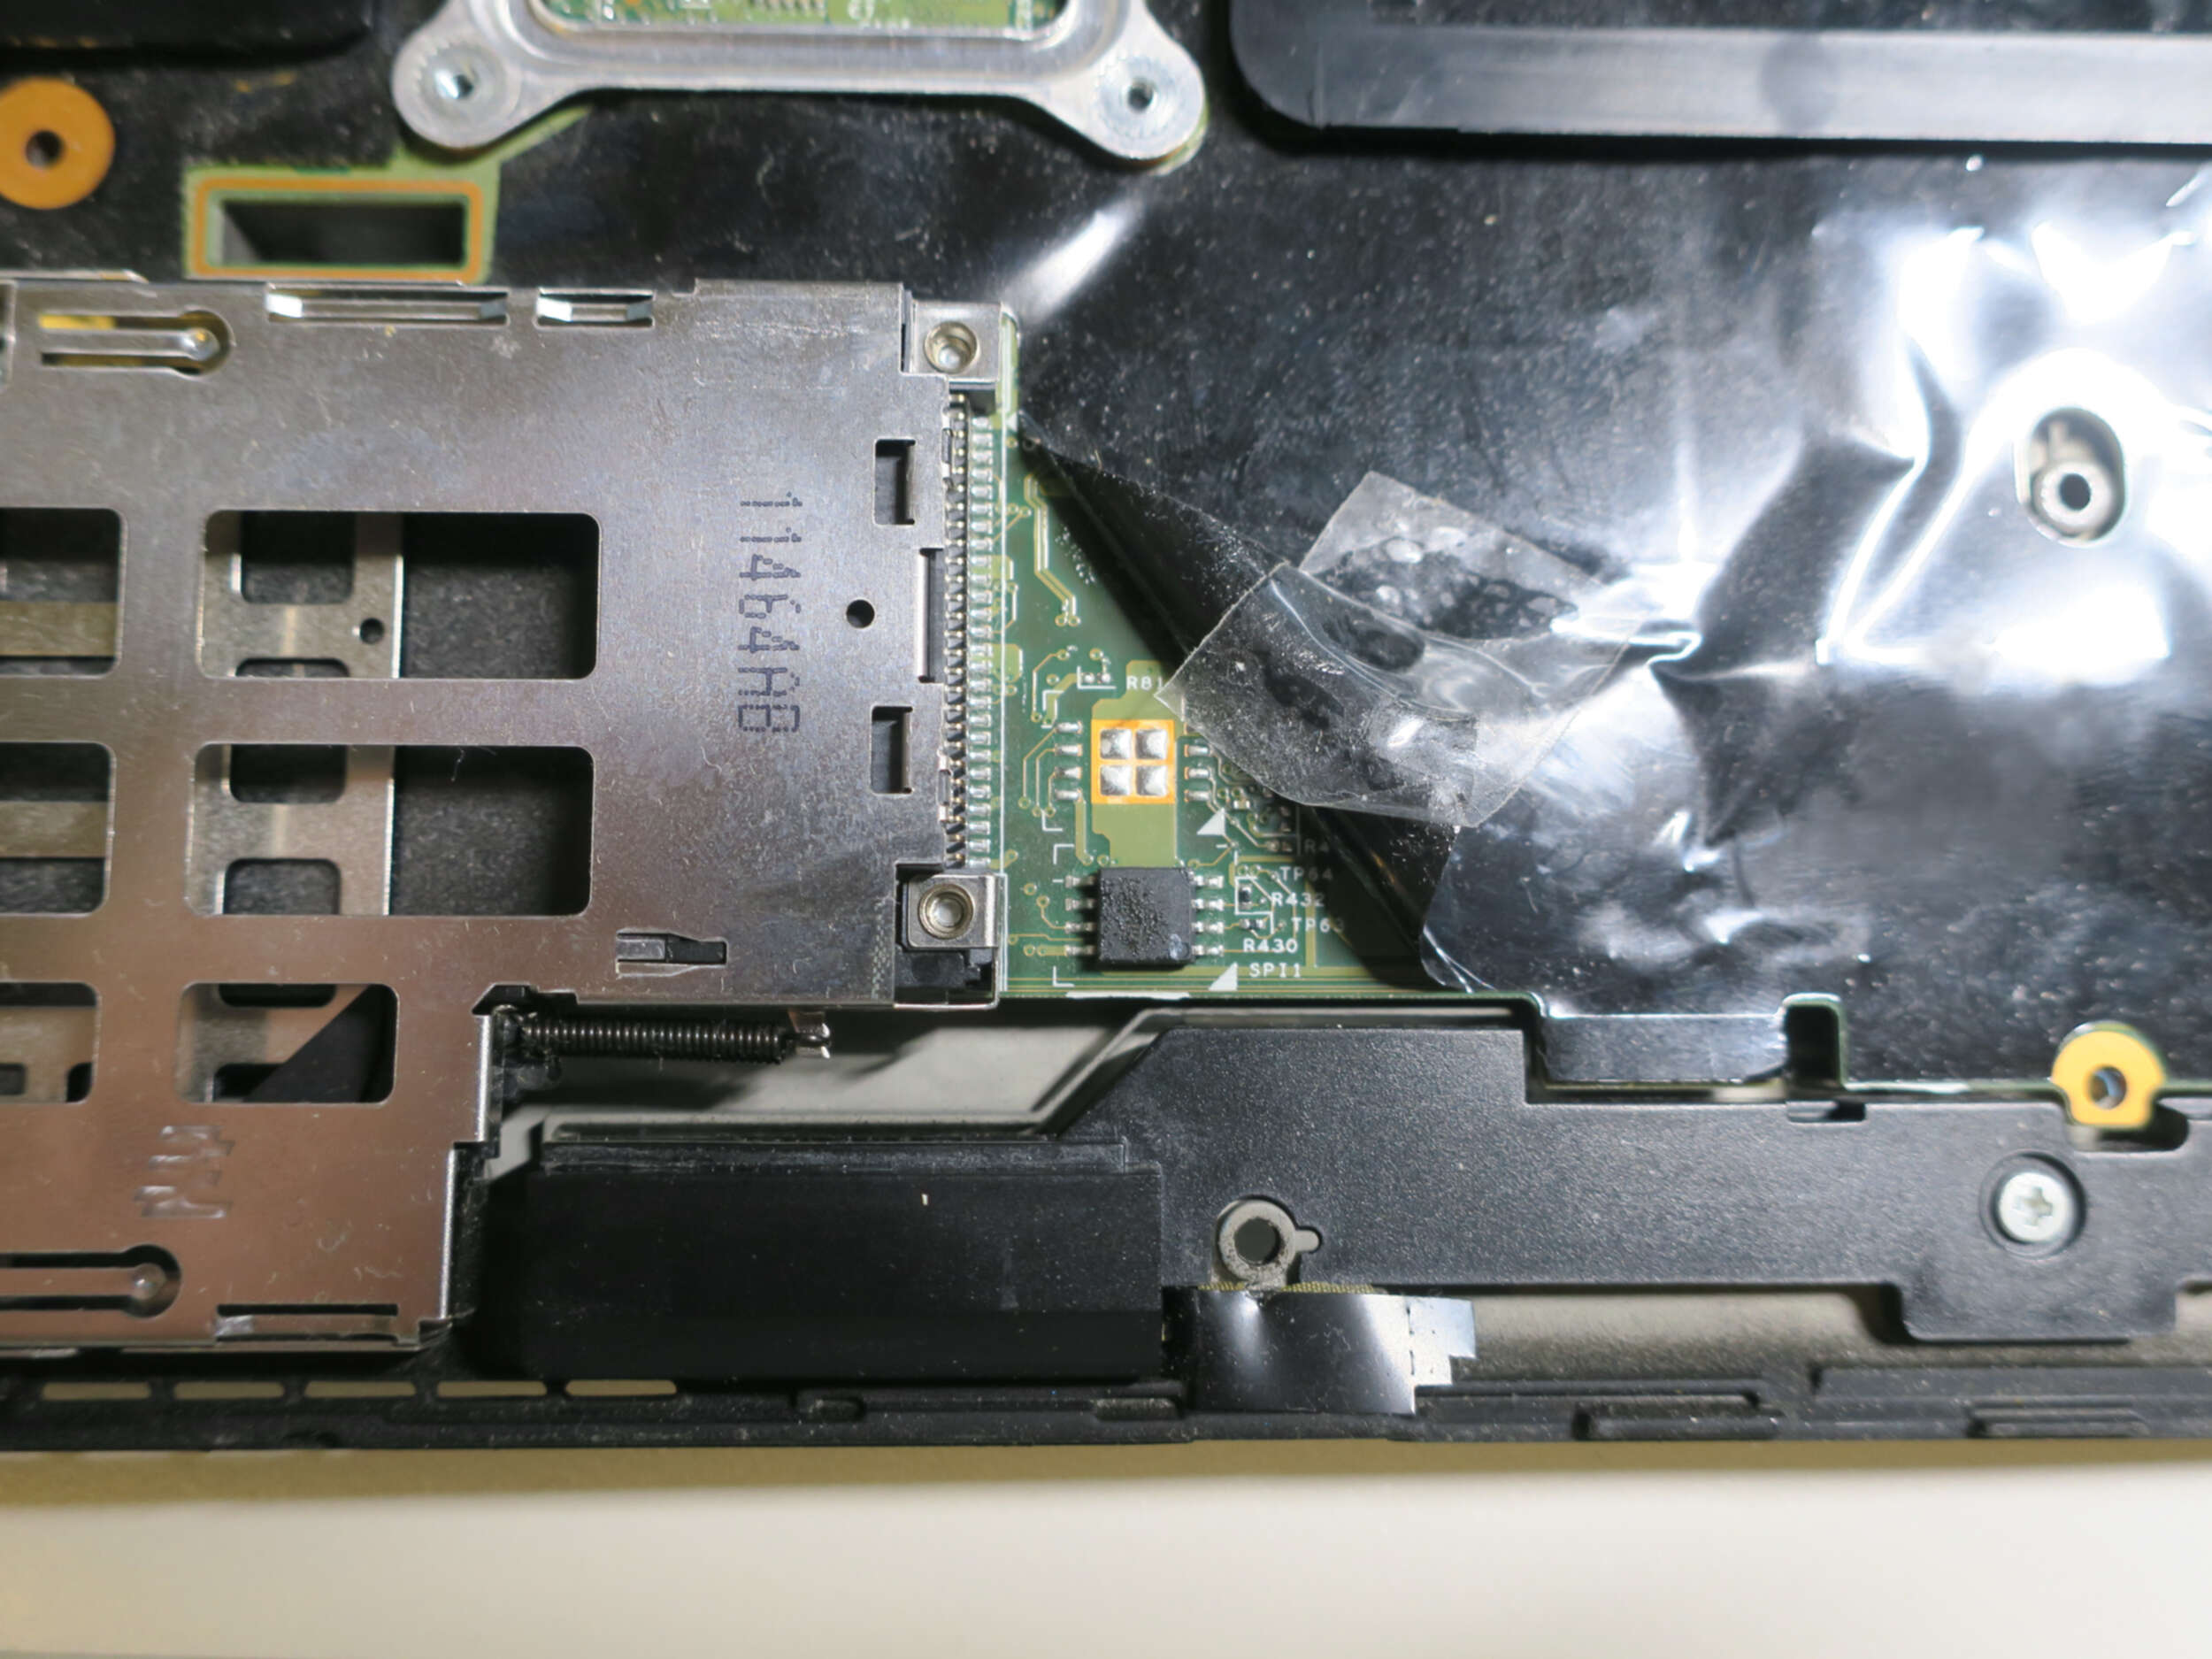
The motherboard is covered with black antistatic film. Lift up the bottom left of the film (just to the right of the ExpressCard slot) should reveal the chip.
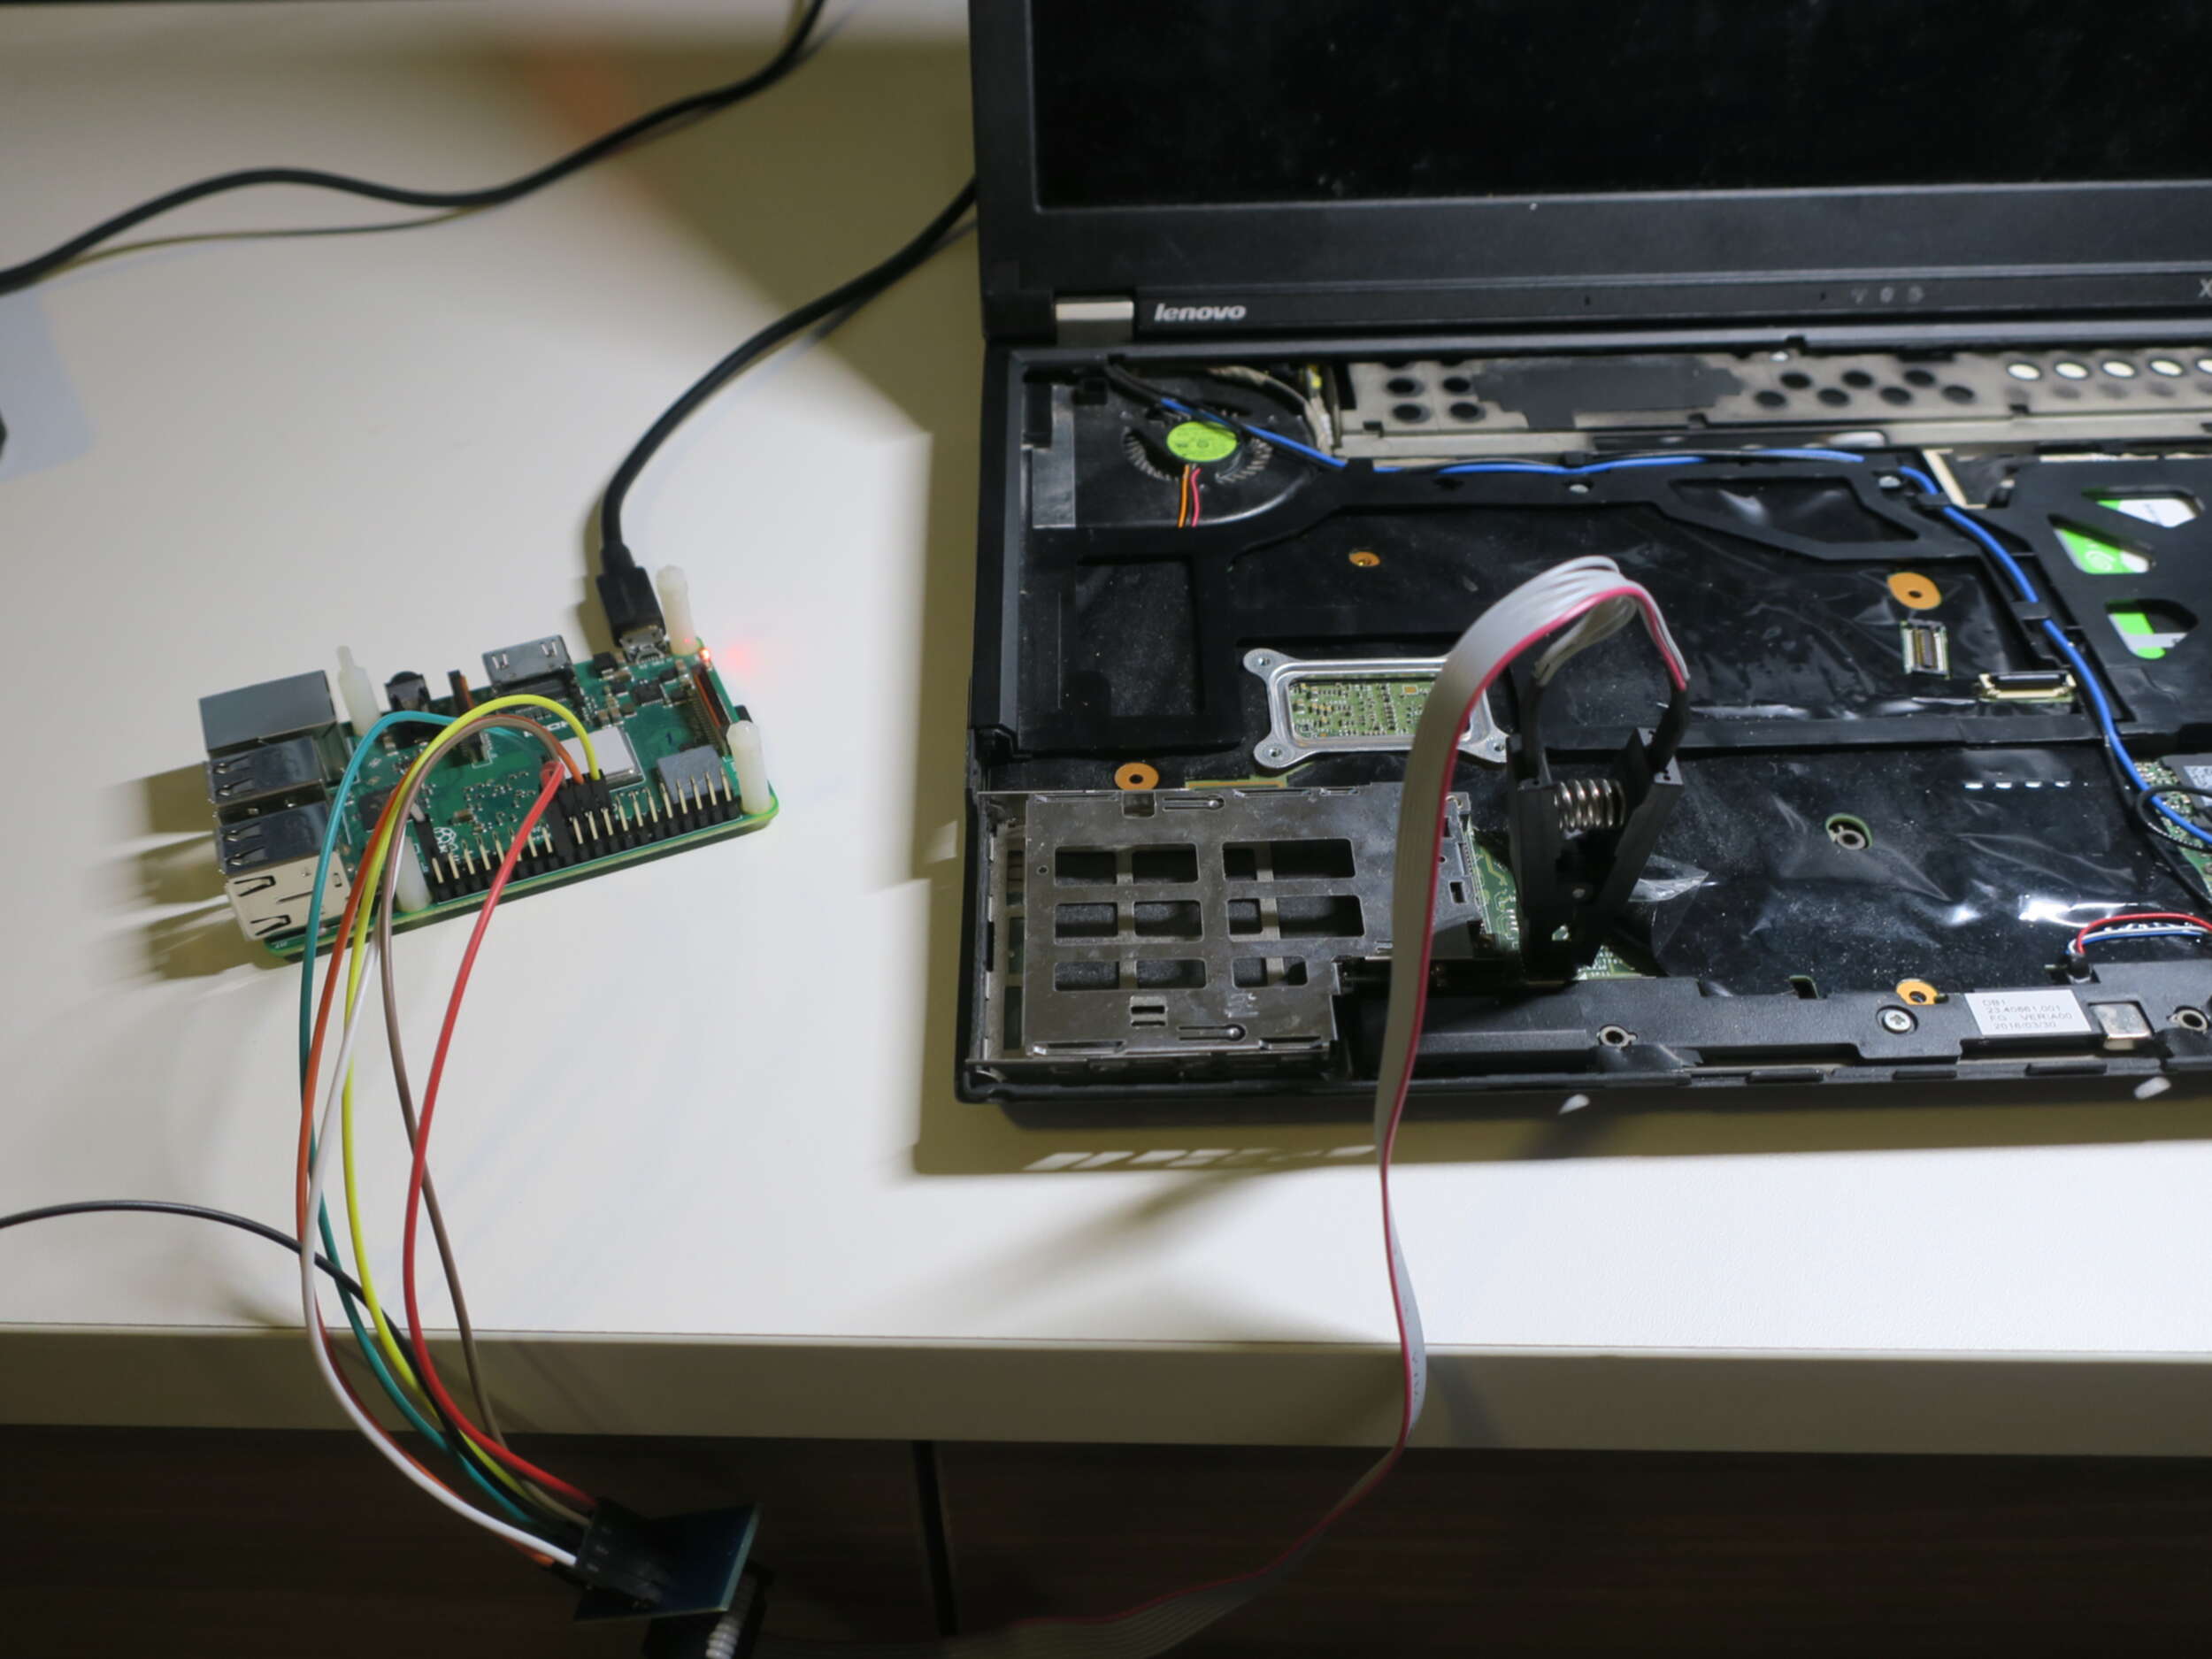
Wire the chip to the Pi
Connect the clip to the chip. The pinout of the chip is (Quoted from X220 - coreboot):
|
|
Then connect the other end of to Raspberry Pi (Make sure it is not turned on!):
|
|
(Yup, we just need 6 of 8 pin on the chip.)
Dump the firmware
Then power on the pi. Compile flashrom, the tool we will be using to dump the ROM and write the new ROM.
|
|
Then we can try to read the chip!
|
|
If it does found there's a chip, it will say something like this:
|
|
Then we can read it. We read it multiple times to make sure we have a good contact.
|
|
If the three md5 checksum is the same, it means for a high chance we have a good read and the dump is correct. Make sure you keep the original dump safe since we need the content of it.
Configure and compile coreboot
I do the compiling stuff on my main computer because it is much faster compared to our poor little pi.
Get blobs
The ROM of a X220 mainly consists five parts:
- Flash Descriptor (4K)
- Actual BIOS (3M)
- Intel ME firmware (5M)
- Gigabit Ethernet ROM (8K)
- Platform data
We only need the descriptor, me firmware and the GbE firmware. In order to intergrate it into coreboot, we need to split them using ifdtool.
|
|
Eliminate ME
Since we're going to use Tianocore as the payload and it is kinda large, we have to save some space for it. We can do so by remove some malicious and unnecessary part of ME and use its space for coreboot.
|
|
Now we can start setting up coreboot toolchain.
Prepare coreboot toolchain
|
|
Customize your very own coreboot!
Run make nconfig to enter configure menu.
Here's my config. Notice that it may change in the future.
|
|
When you finished, just hit Esc and choose save. Then just use make to let thing happen.
Flash new rom
If everything is good, the new rom should be located at coreboot/build/coreboot.rom. Transfer the file to the rPi (always check the checksum!) and use
|
|
To flash the rom into the machine.
Finish!
Now, detach the Pi, connect the handrest and the keyboard. Connect to power supply, and hit the power button.
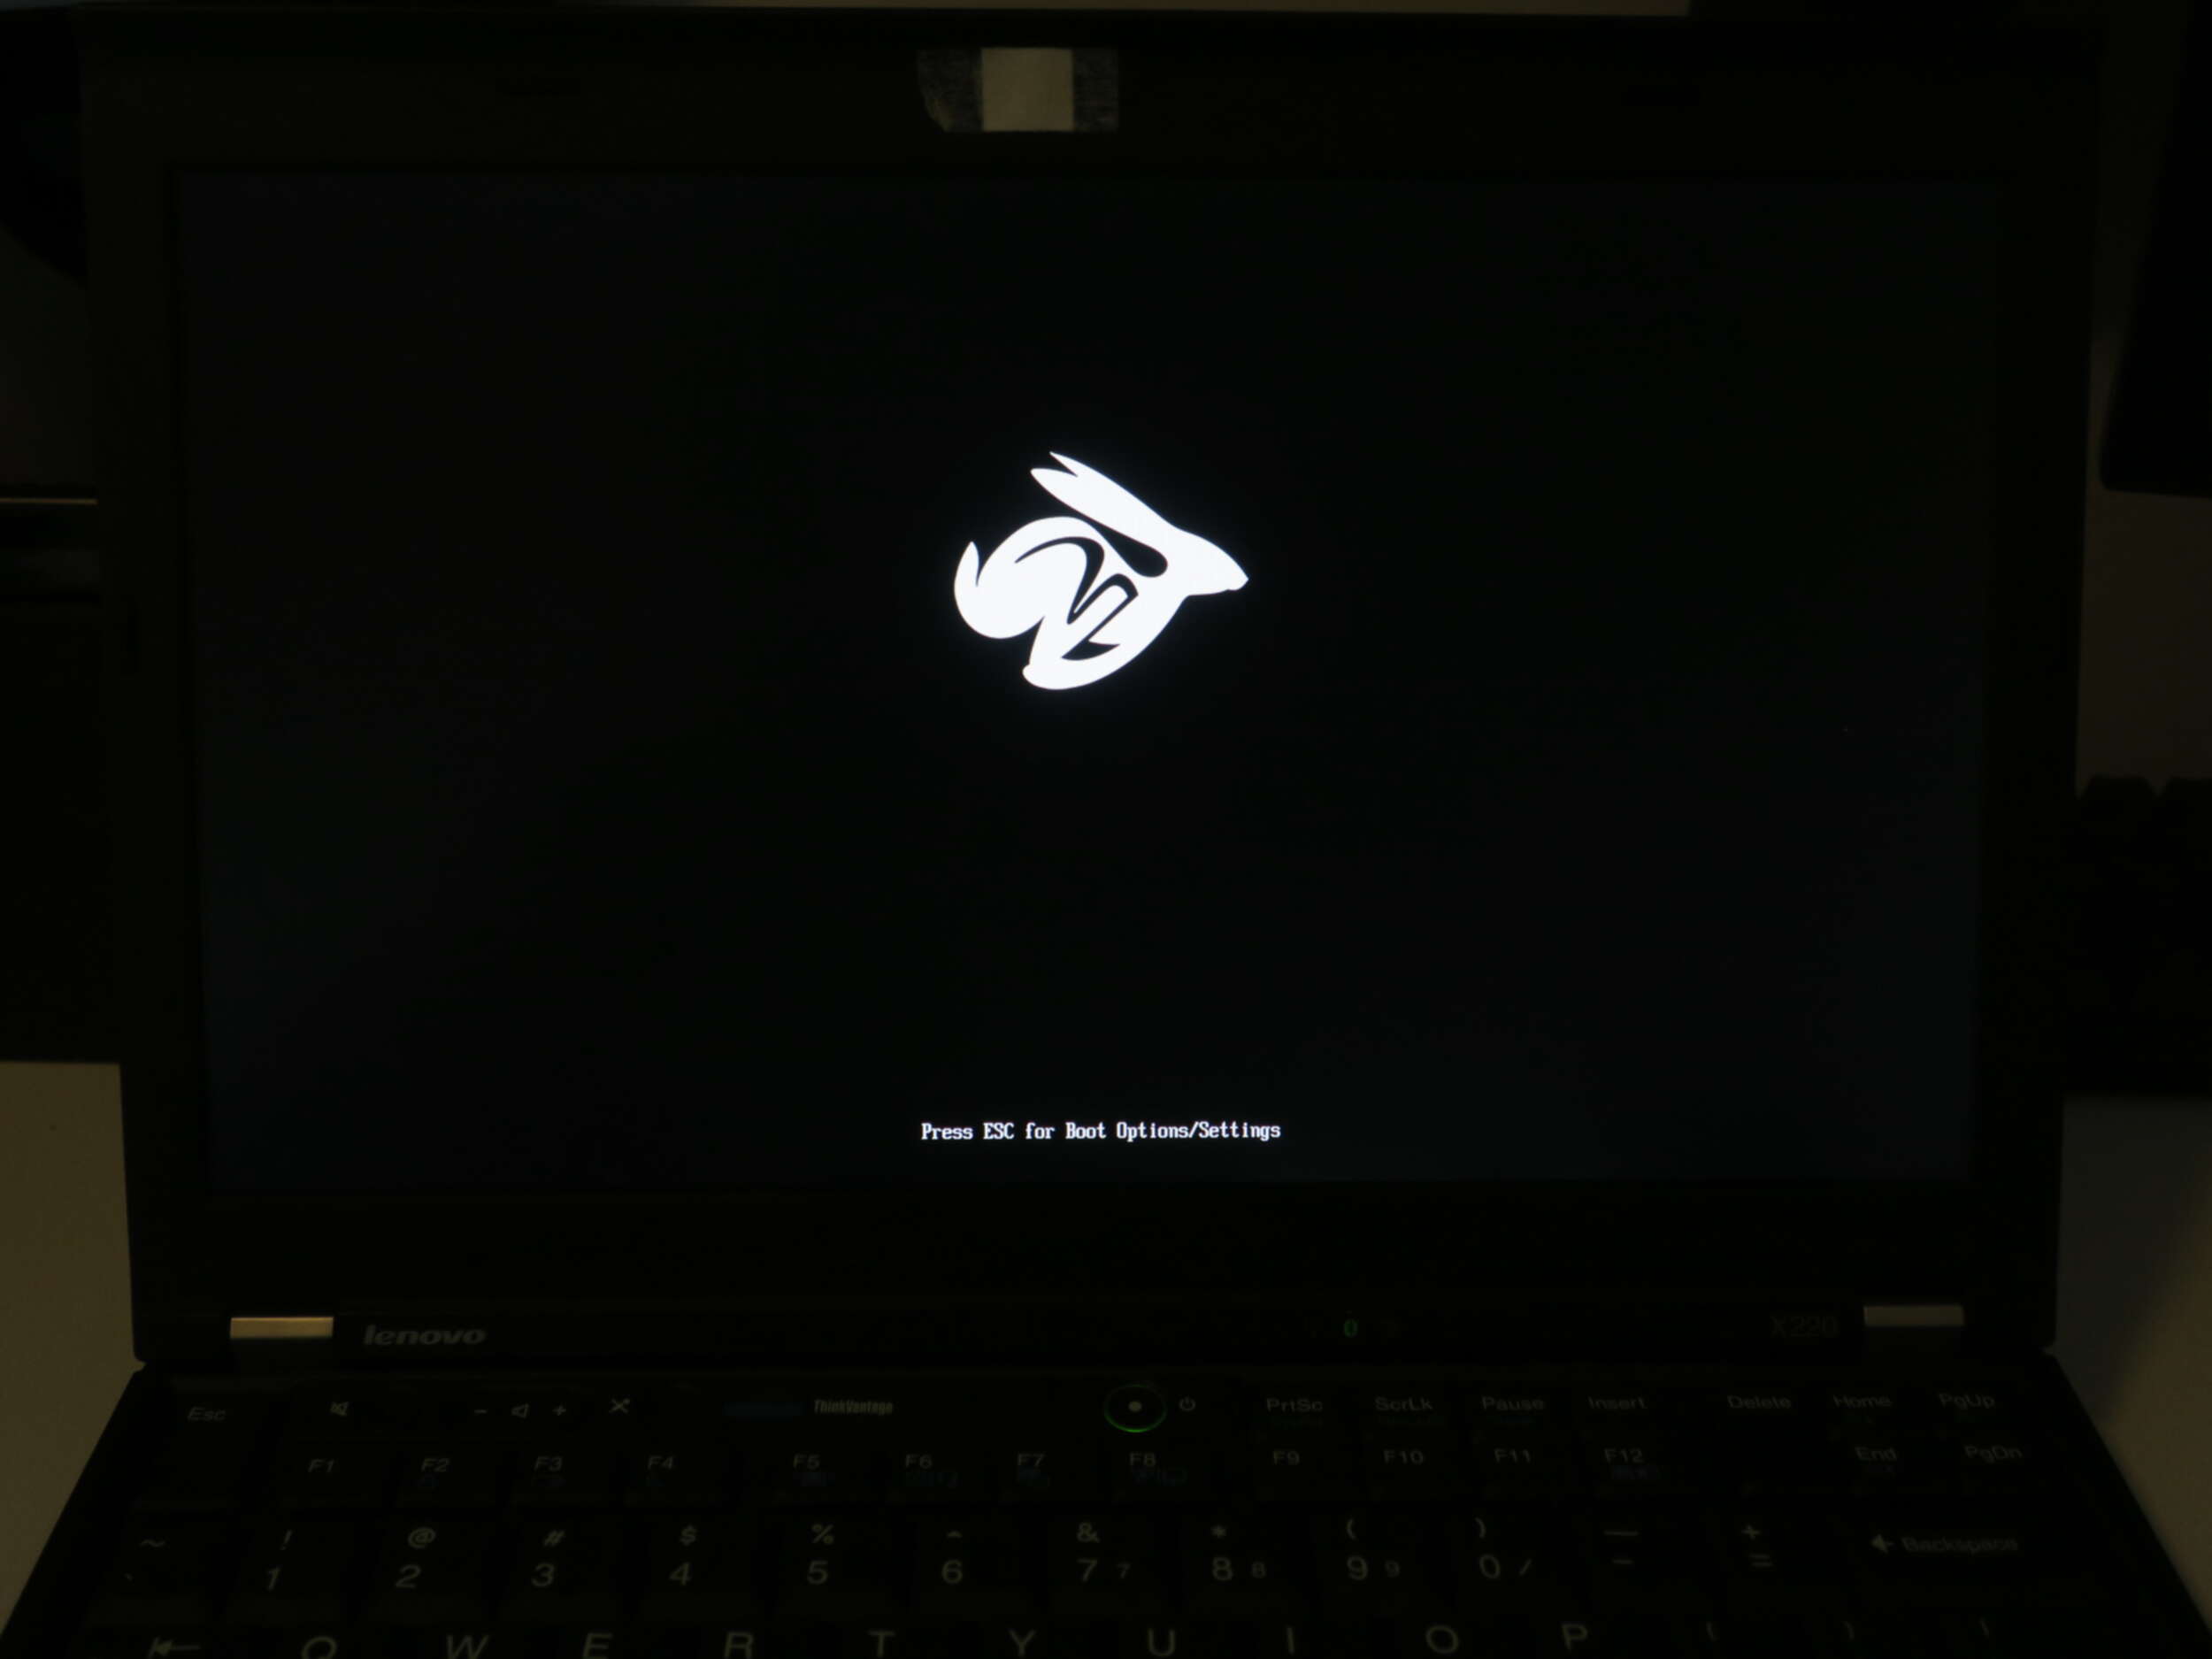
If you have a cute rabbit on the screen, you are a winner!
If not, it's okay. You can always try again. And if everything goes wrong, you can just flash back to the original dump and use the official firmware.
Check ME status
In theory, ME should be in limited function status right now. If you want to make sure, you can use intelmetool to check ME status.
After install the tool in AUR, reboot the system and add iomem=relaxed in your kernel parameter. Then, run intelmetool in root. You should get something like this:
|
|
As you can see, ME is working in Recovery mode right now. Which means most malicious functions should not work any more.