Earlier this year I brought a pair of Sony MDR-7506. It's great. The audio quality is gorgeous and it is pretty light weight. However, since it is intended to be a studio headphone, it comes with a very long coiled cable.
This causes a ton of headache. It is convenient when using it at home, but when I want to take it out, sometimes the cable takes up more of my bag space than the headphone itself. Also, I had to adjust the cable very frequently when using it.
So I wish to mod it. It would be very handy if I can attach a 3.5mm to 3.5mm to it. Lucky this specific pair of headphone has a very industrial design. It only takes a few screws to take apart. It even comes with a detailed graph labeling its parts and electrical schematic.
So, I ordered some 3.5mm panel mount, and get to work.
Preparations
- MDR-7506 headphone (Of course)
-
Some 3.5mm female panel mount
- you may want more than one, just in case
- Screw drivers
-
Drill
- The hole for the cable is not large enough
-
File
- Need to remove some of the plastic to fit the 3.5mm mount
Get to work
All the modification happens on the left driver. Remove the left ear pad and this should reveal four screws.
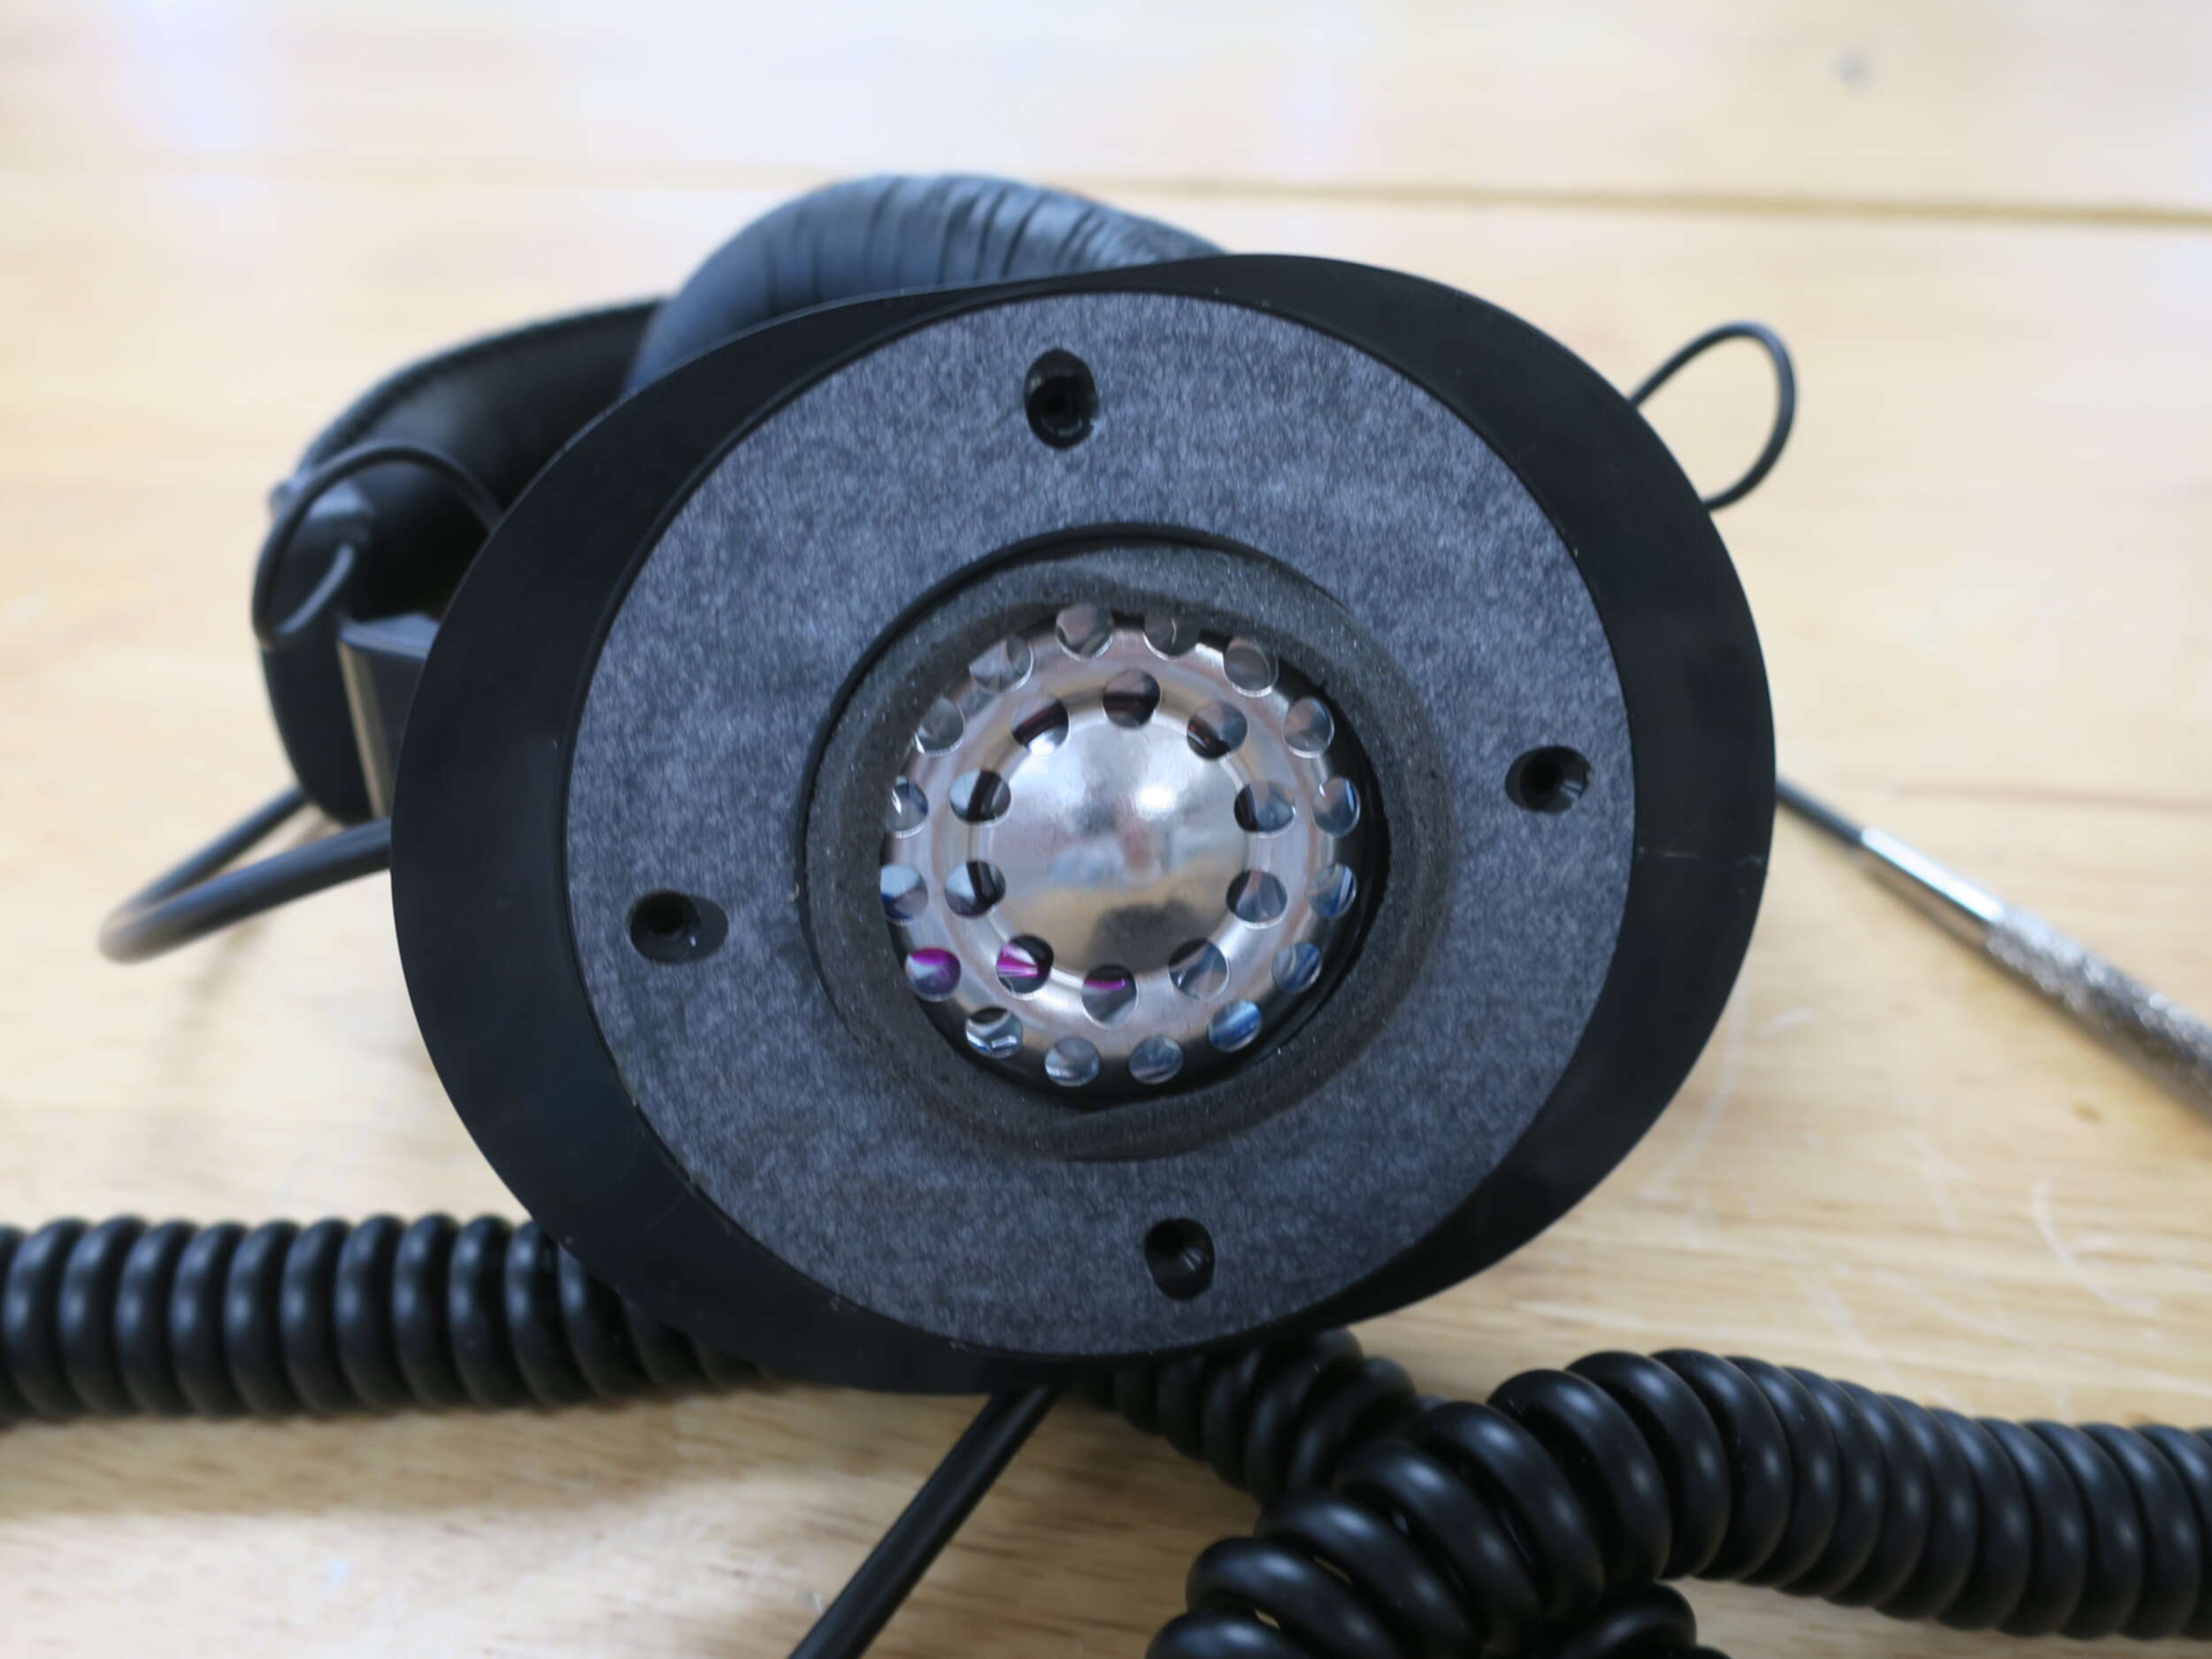
Remove all of them, and now you should be able to see the wires to the driver unit.
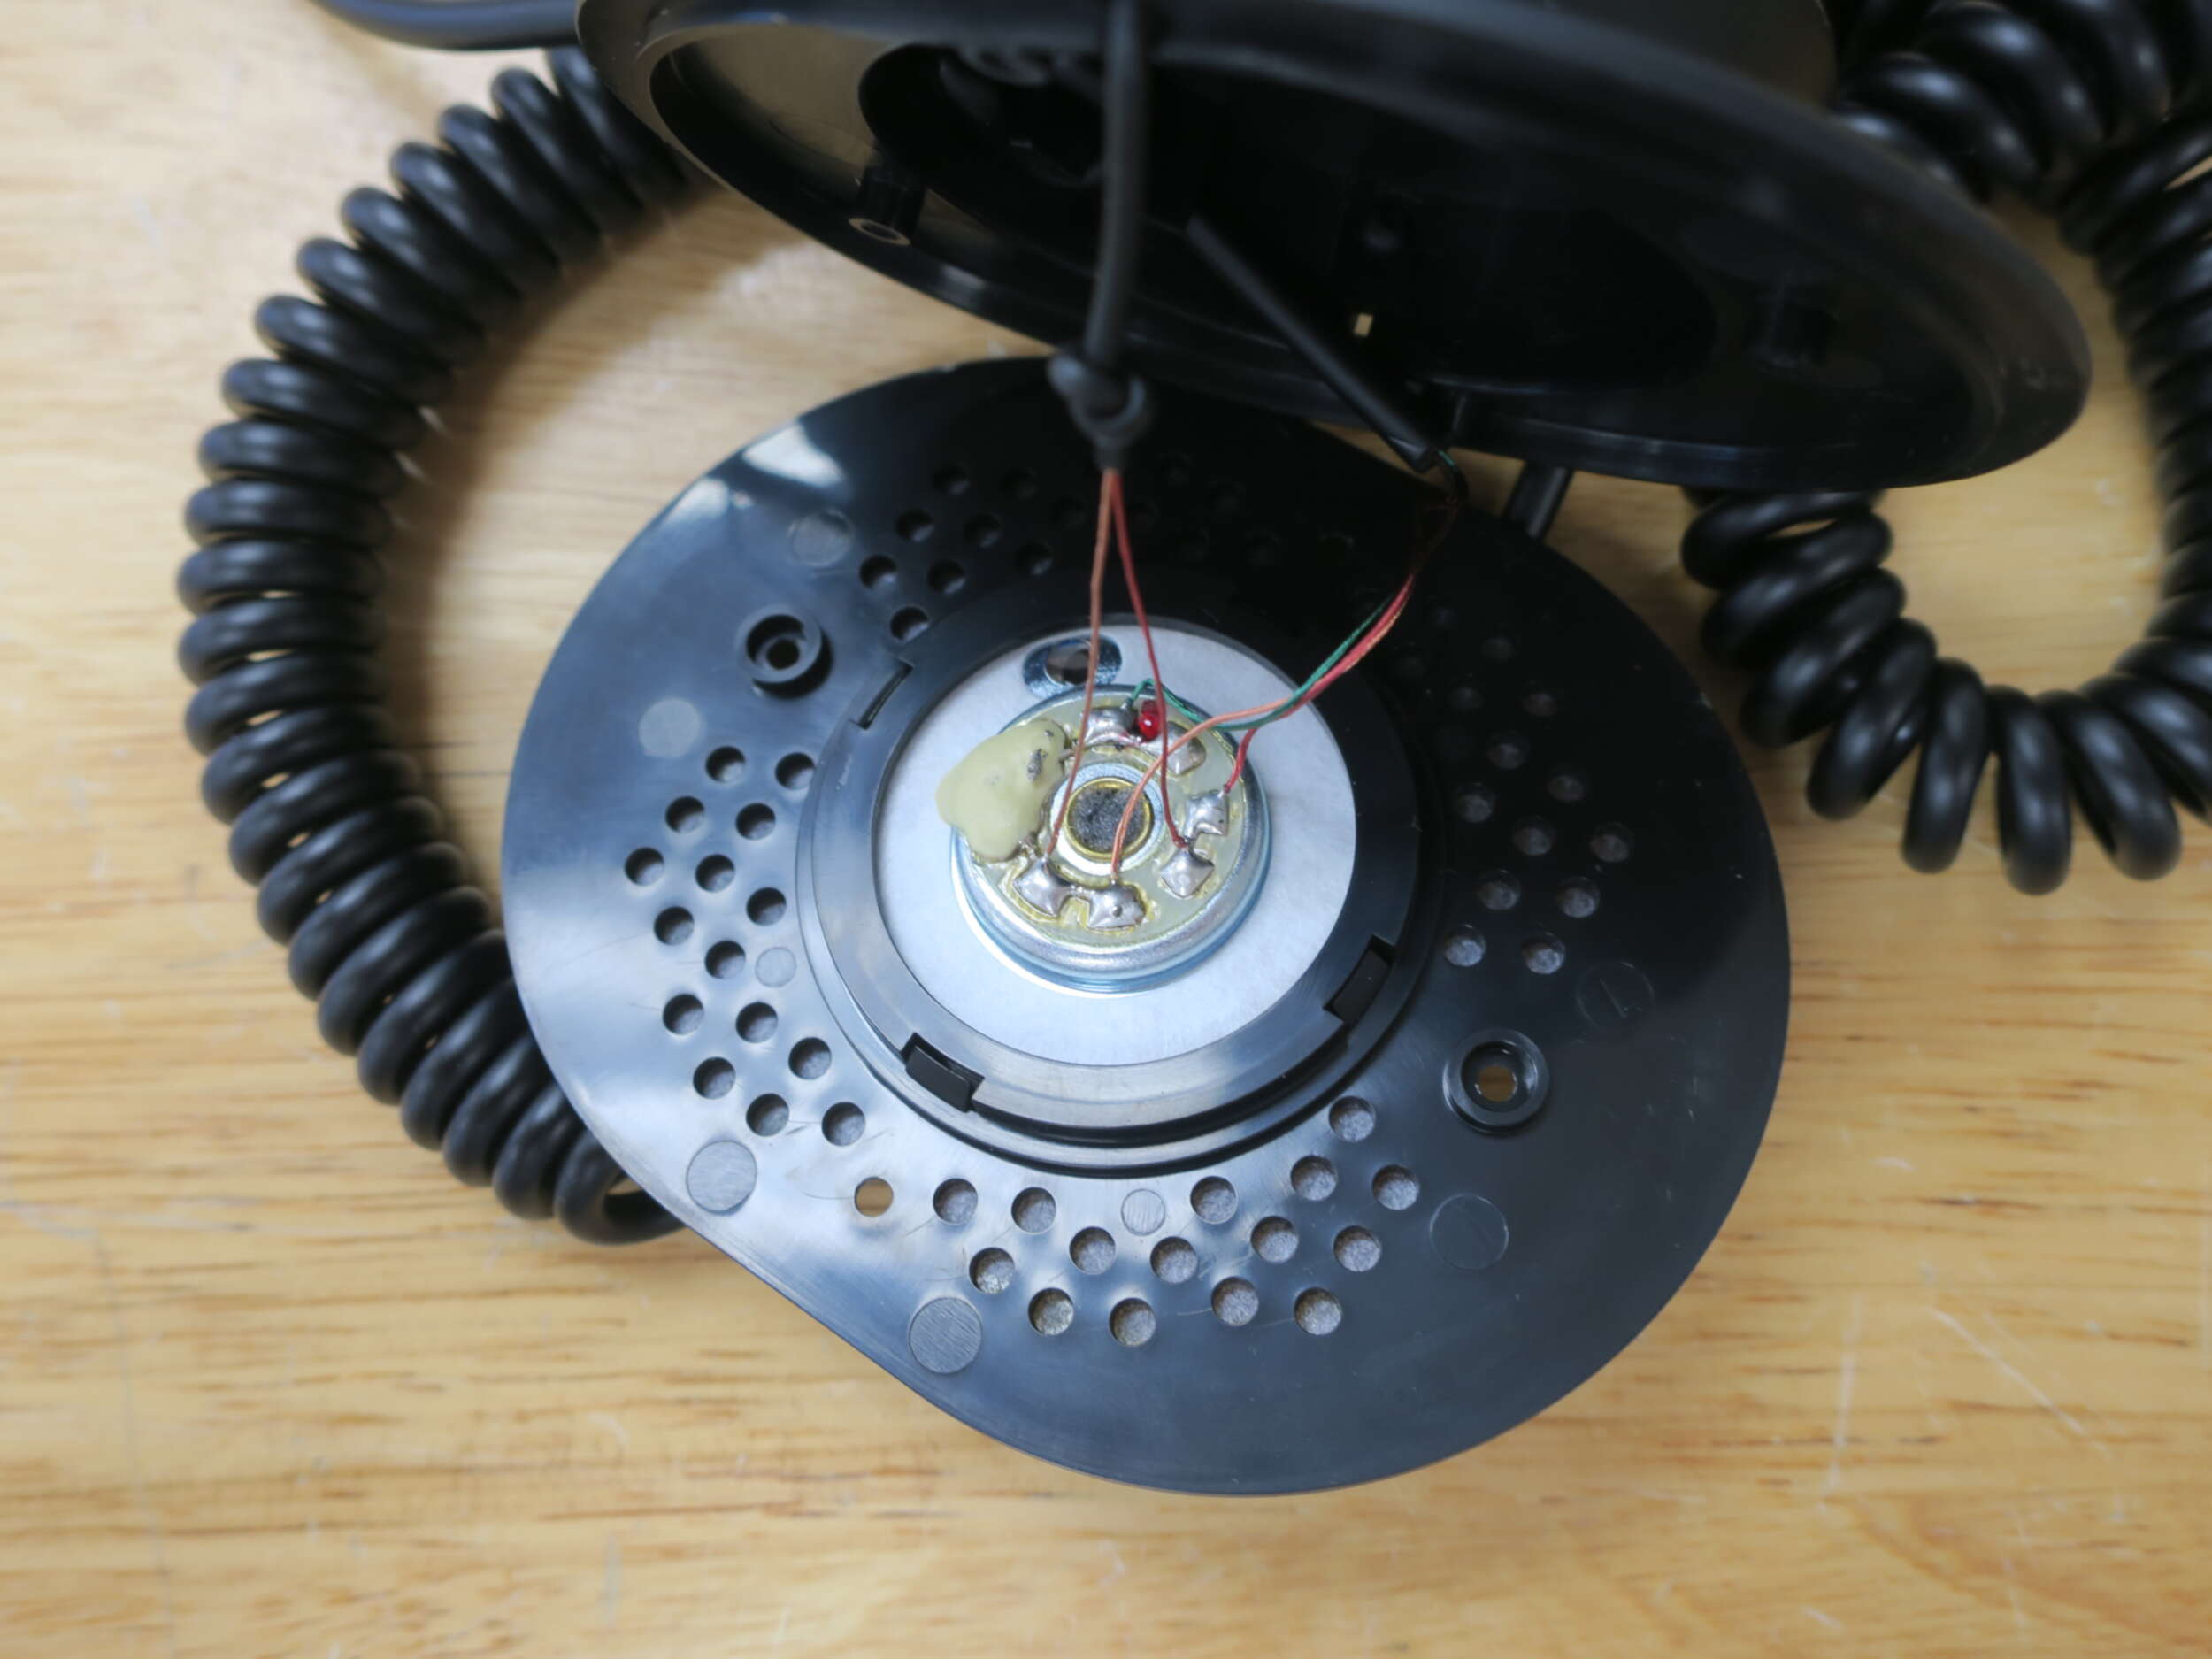
Since we just need to replace the long cable with a mount, we won't touch the wires coming from the other driver. Just desolder the three wires which comes from the 3.5mm cable and then pull the cable out. Notice there is a little rubber tube at where the cable come out of the headphone. Remove that too.
Then, pick some fresh wires and solder them onto the solder joints we just desoldered. If possible, use wires of original color since it would make life much easier.

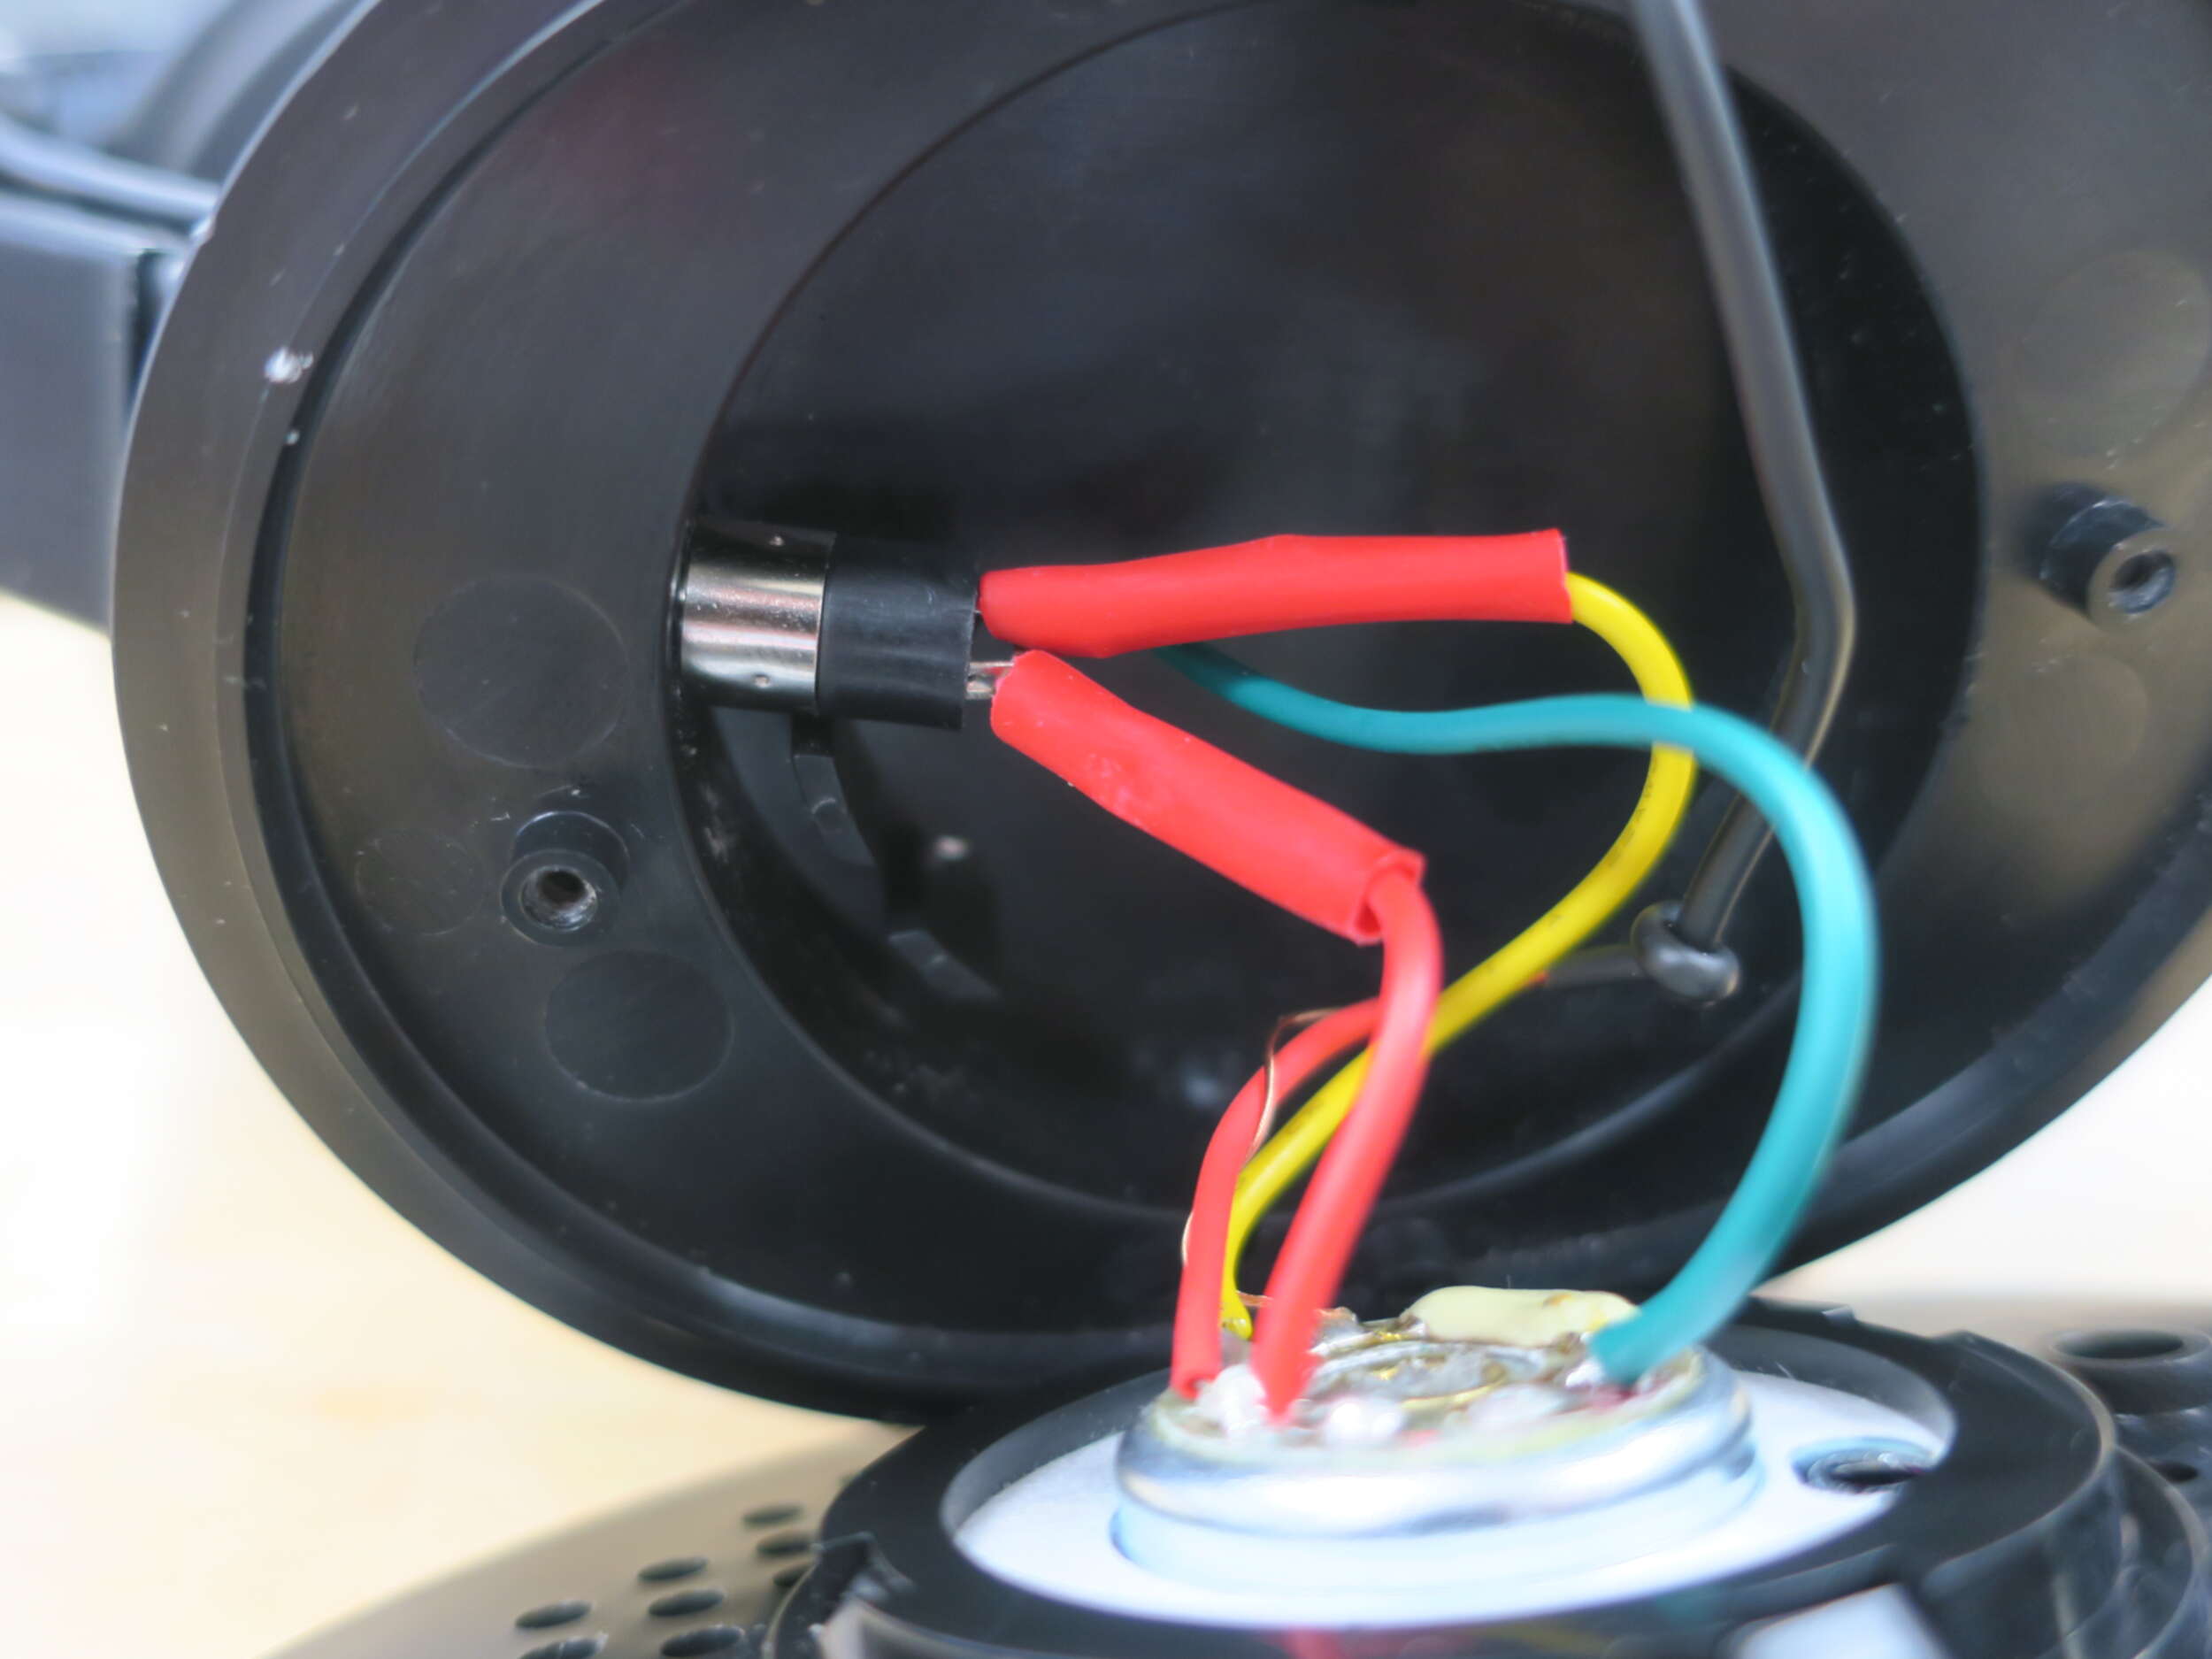
Now, grab a 3.5mm mount. My mount has three ends: one longer lead for the ground and two for both channels. Figure out the order by plugging in a 3.5mm cable and use a multimeter to test the connections. The diagram for a 3.5mm plug can be found easily online.
After figuring out the lead order, put a head shrink on the cable and solder the wires to the connector so that they won't touch each other by accident. Then solder the wires to the corresbonding leads.
Now we can try to fit the connector into the hole. Unfortunately the connector is a bit wider than the original cable, so a drill is needed to enlarge the hole. Gradually use larger drills and eventually the connector should be able to fit in the hole without any effort.
Also, there is a little piece of plastic that guides the cable on the outer side of the hole. It's quite small so I just use a file to remove it. In order to make sure the nut on the connector have enough space, I almost entirely level that surface.
Now we can try to screw the nut onto the connector. Should be really easy.
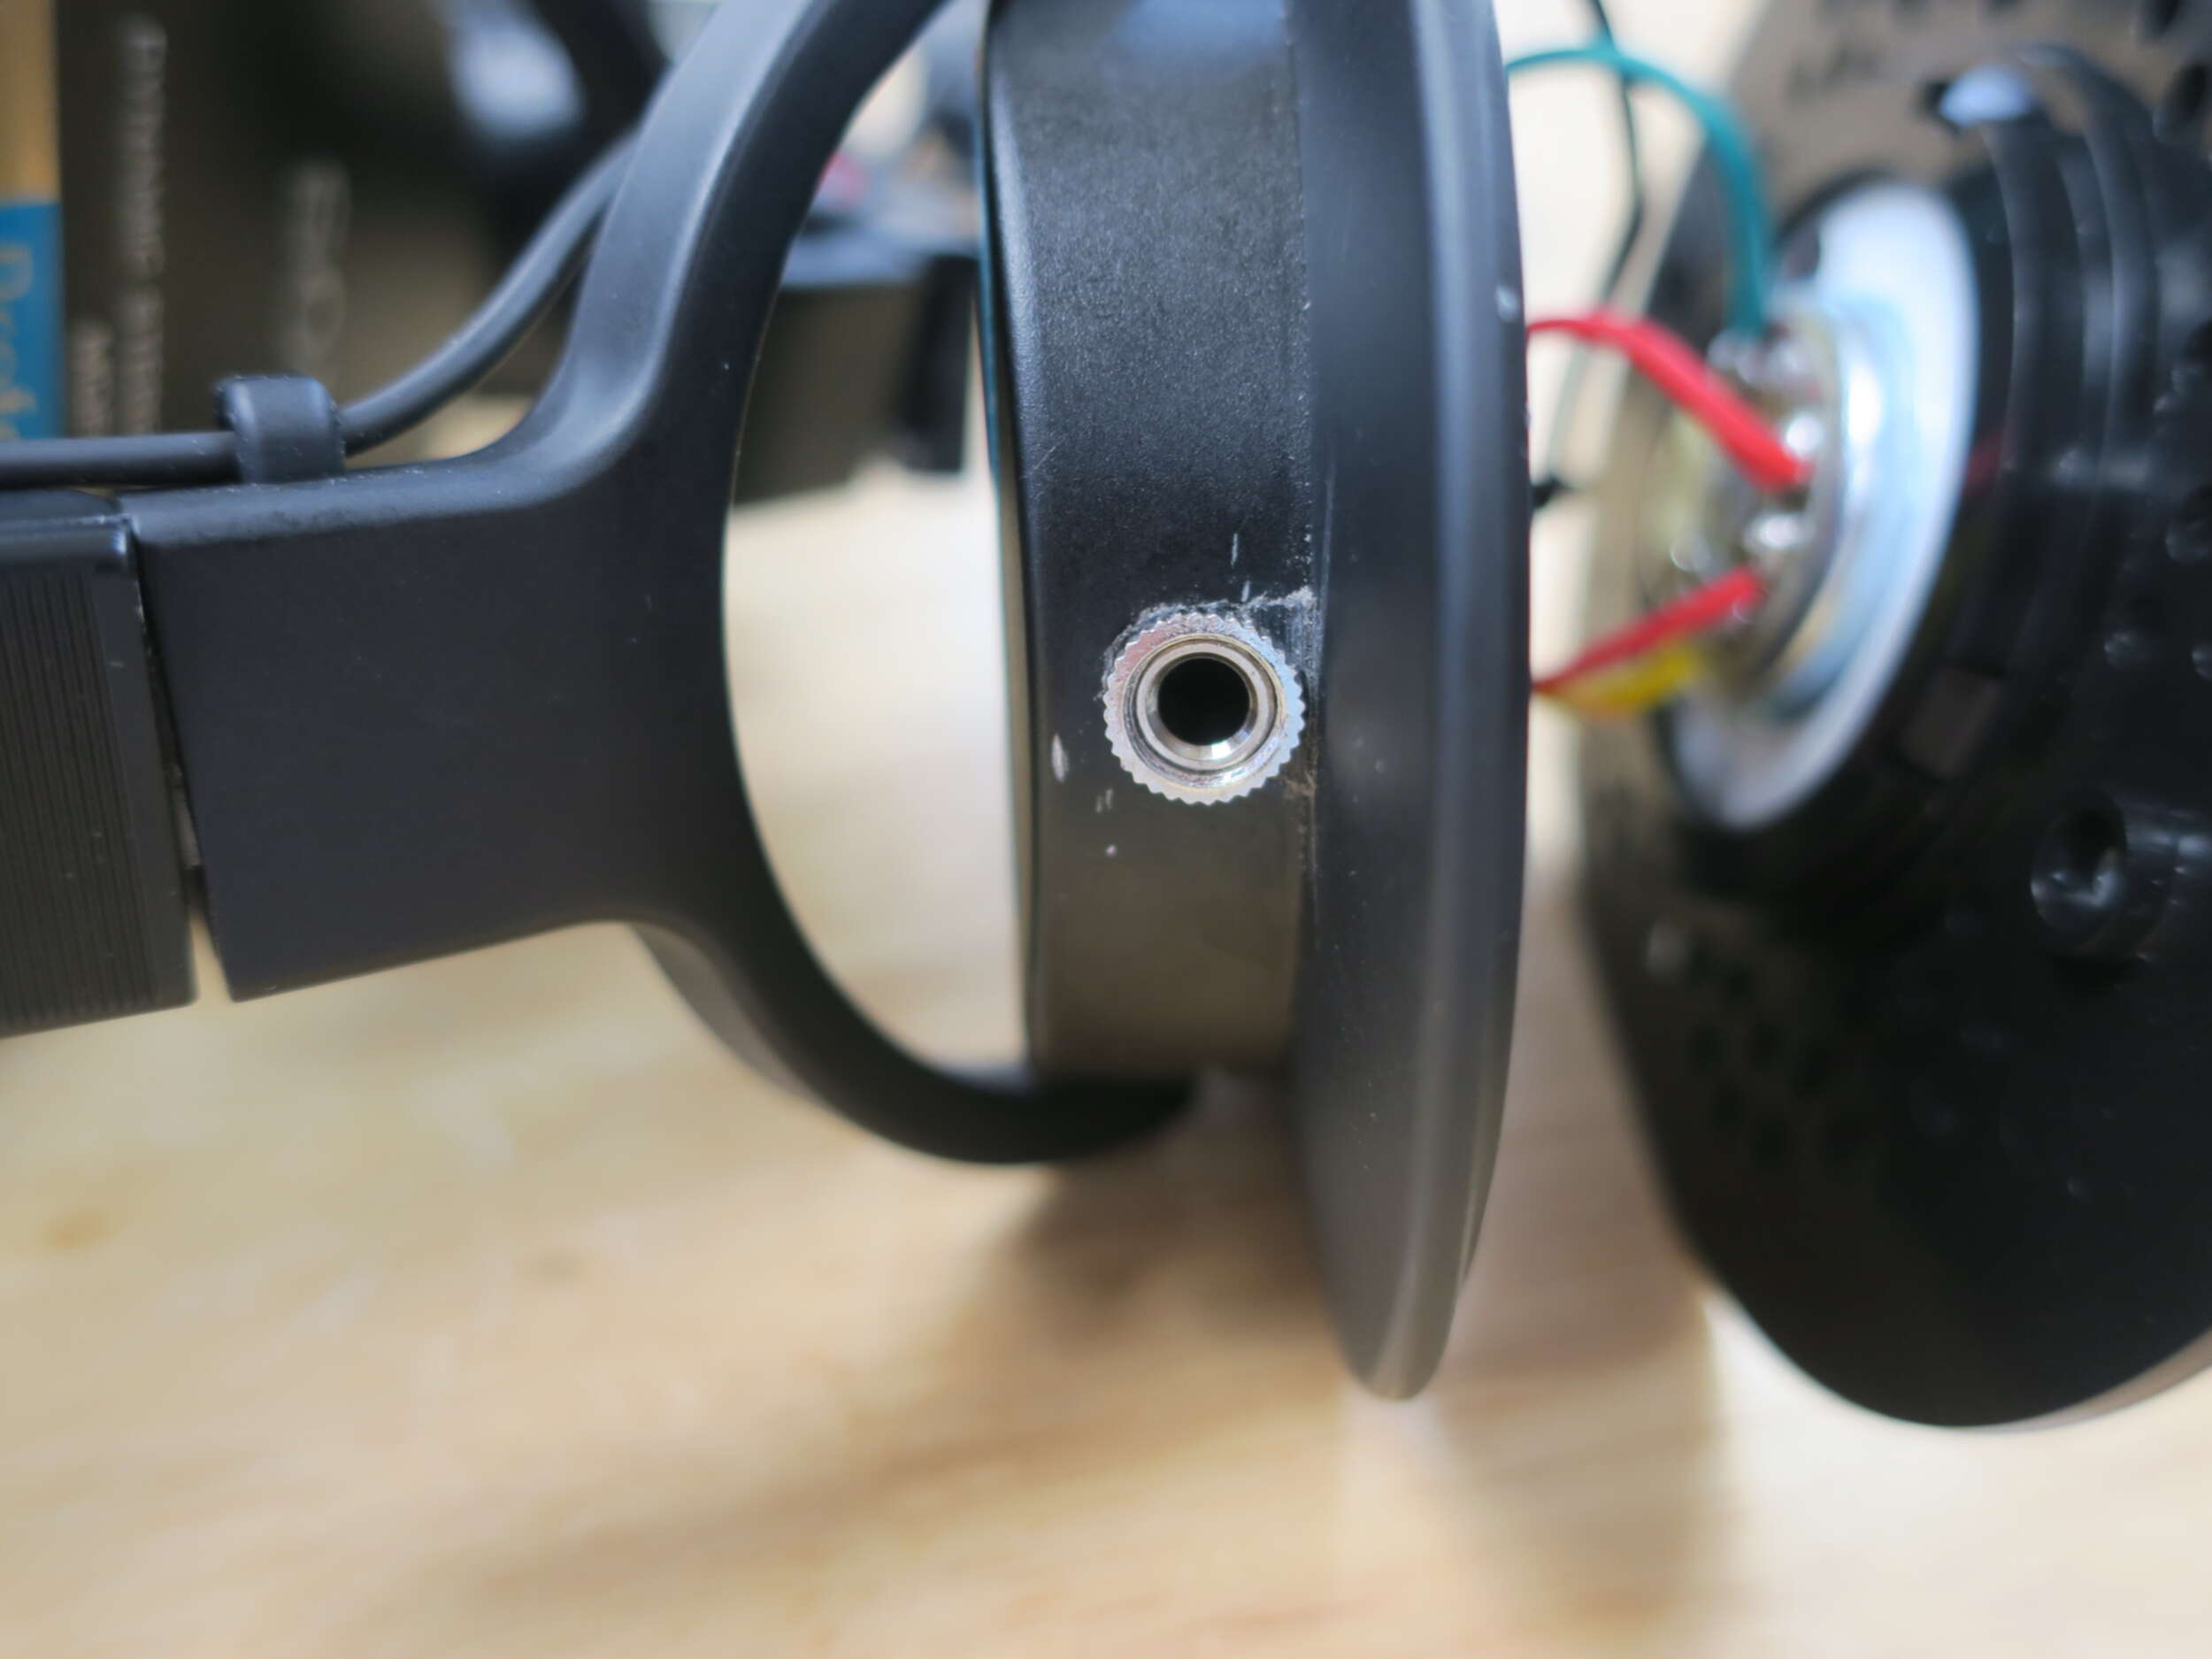
As you can see, I screw up a little bit and accidentally scratch off some surface on the headphone. No huge deal, though.
Complete!
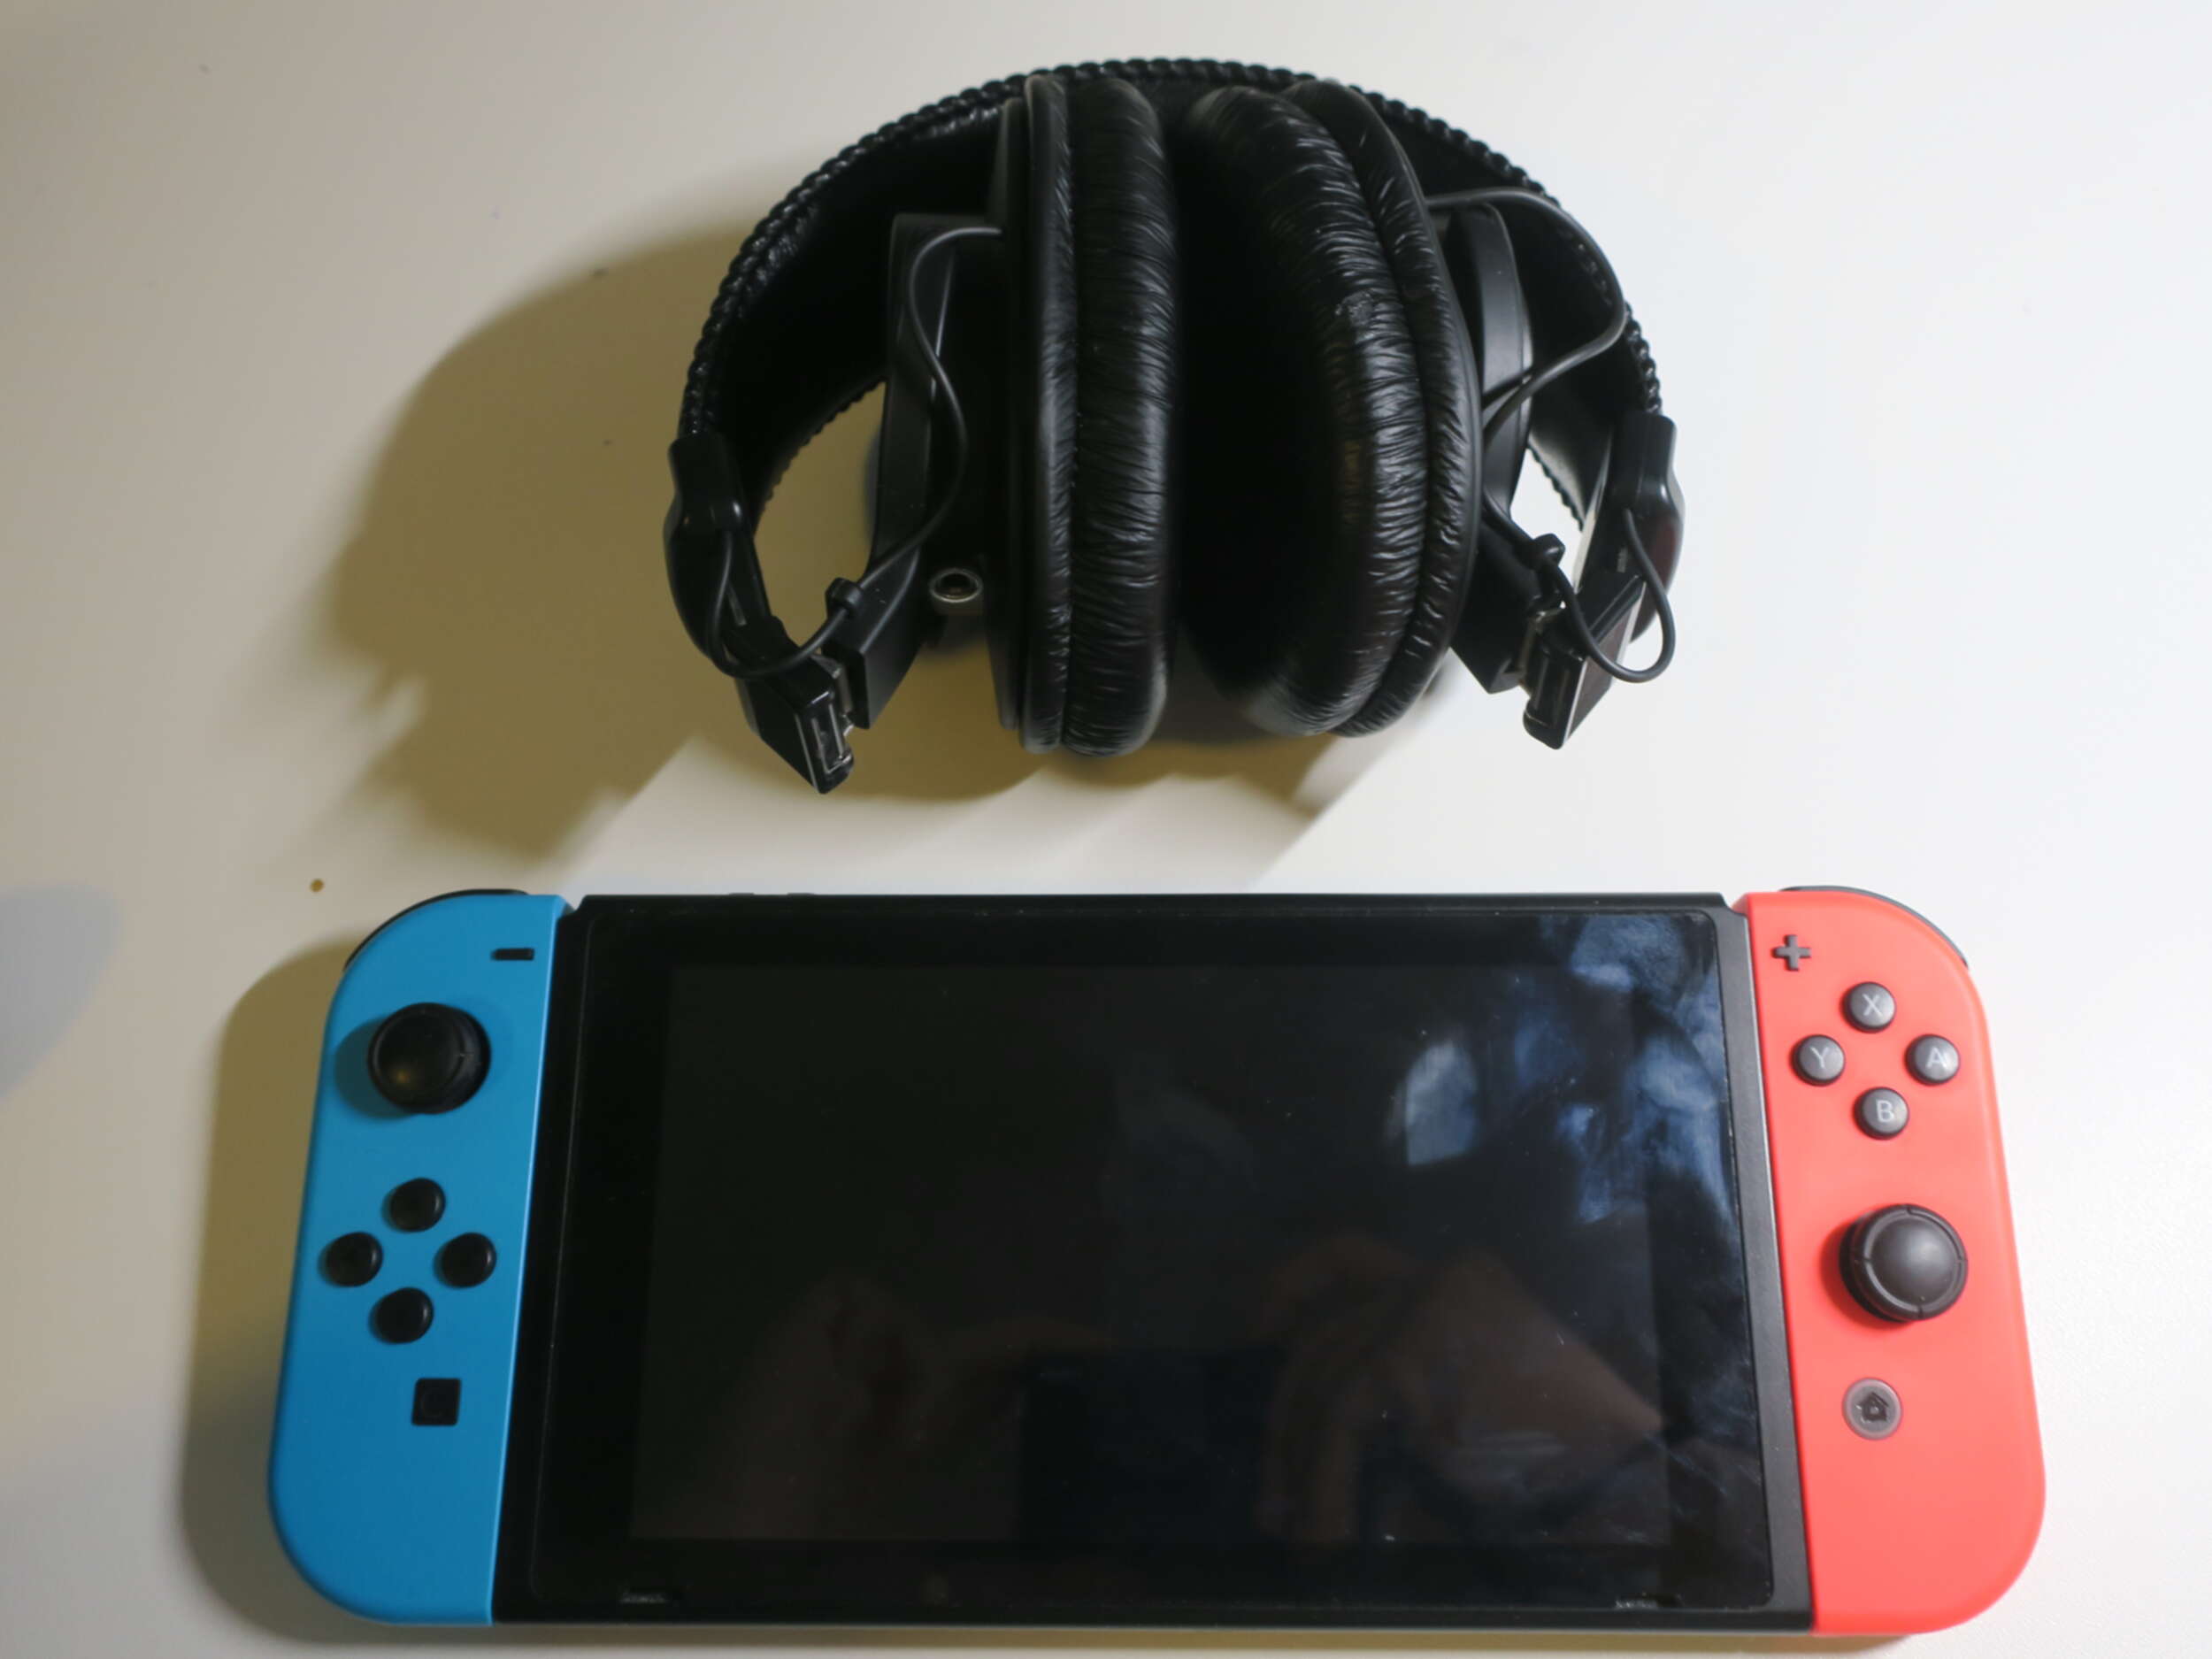
We are finished! Without the annoying cable, now the headphone is surprisingly compact. When folded, it is even smaller than a Nintendo Switch! (the headphone is significantly thicker though)
Ah, the sound quality. I noticed some crosstalk on the modified headphone. However, I never did the same test on the original headphone, so I cannot (until I grab another pair of these, maybe) if it is a problem of the electrical design. Also, since I cannot notice any difference when hearing some familiar music with it, it's not an issue for me.
So, generally, a successful mod.